

___________________________________________________________________
Assignment 5: Depth of Field / Aperture Assessment
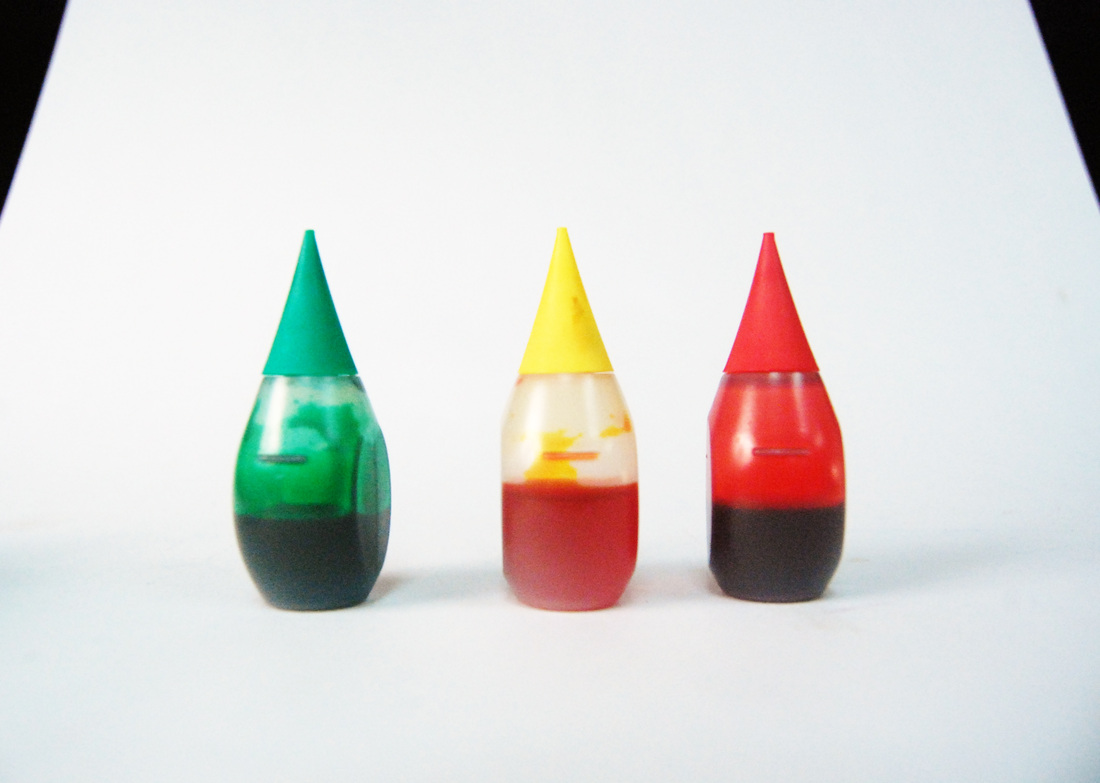
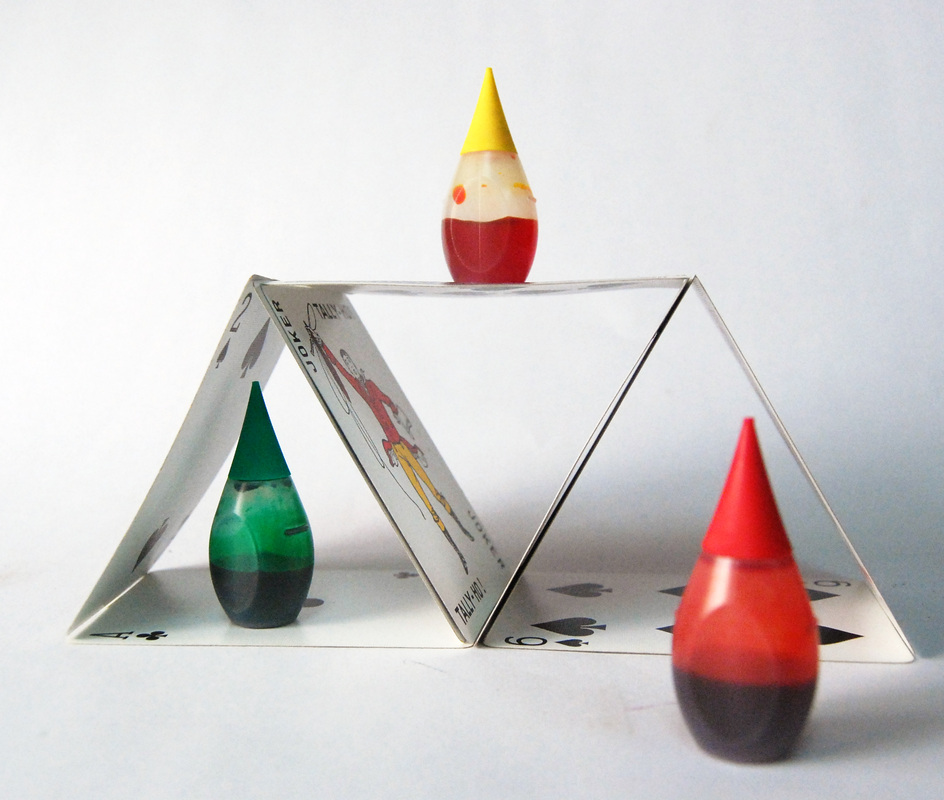
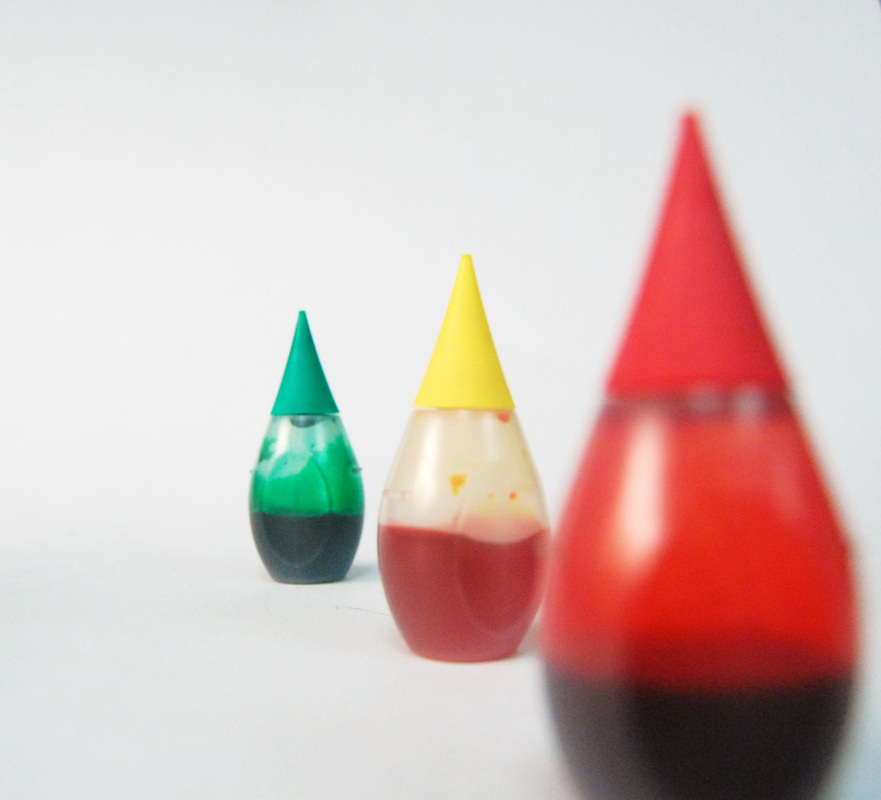
My depth of field/aperture photos were taken in class using a white poster background and the school cameras. All 3 photos are of little bottles of food coloring. In the first shot, the 3 bottles are all in focus and lined up in a perfect row. In the second shot, the foreground red bottle is a bit out of focus while the background of cards and the other bottles is in full focus. The third shot is of the 3 bottles again, but this time they slowly become more and more focused and the photo moves more into the background. To create these effects, we had to change the aperture settings on the camera and change what we were focusing on. To create the first shot I used an f shot of f/32. For the second shot I used an f shot of f/10ish and focused the blur towards the front versus the back. In the third shot I used an f shot of f/3ish to give a slow switch to full focus. We were able to change what was actually in focus by turning the lens cap and manually focusing. In my opinion the best photo is the third one because it displays the effects of depth of field and aperture the best. It shows the change from out of focus to in focus and it shows that using the blurring in the front and focus in the back makes a sense of depth appear instead of the photo being flat and boring like the first photo is. I think a shall depth of field would be good in order to really show depth and to also put focus on only one part of a photo. For example if you wanted a picture of a flower but the background was also filled with tons of similar looking flowers, you would probably want a shallow depth of field in order to put the focus on the exact flower you want to photograph. A large depth of field would be good if you actually want to capture everything in the photo, like if you are taking a group family shot with the people lined up in rows or if you were taking a shot of all of the flowers together versus just one individually.
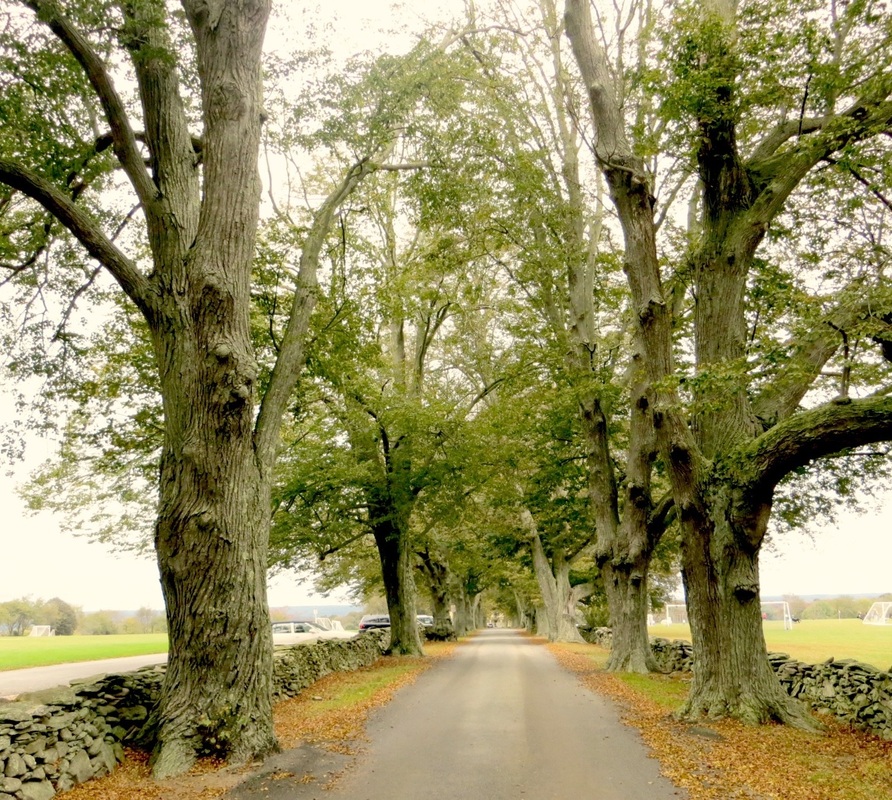
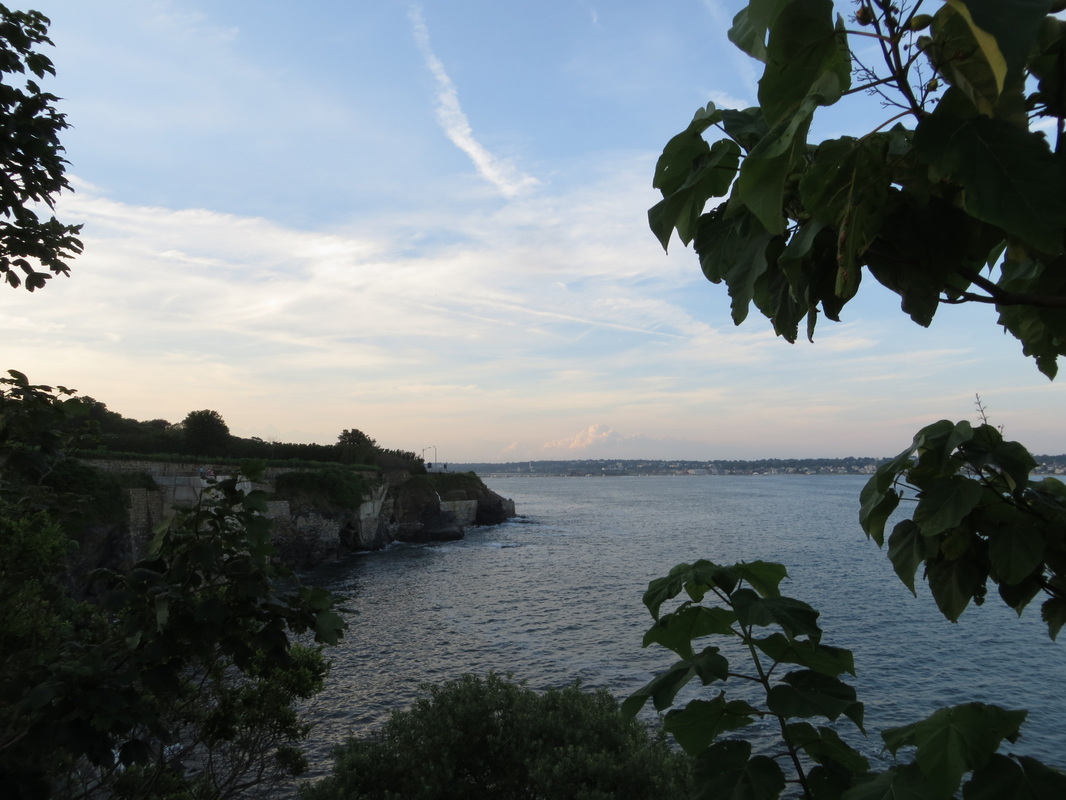
My depth and space photos were taken both out of class and in class. My first shot is of a street that was lined on the sides with a brick wall and trees. As I was driving down it I saw that it looked like it just continued to go on forever and the depth of it was incredible, and so I got out and took a photo. The second photo is of a bunch of bricks facing towards a center point to give the idea that they keep going back and back and back through the use of leading lines. The third photo is a framed photo to give the idea of depth by showing viewers that the water and the sky are behind the plant that I was taking this photo through. The framing plant serves as a foreground and allows the sky and water to be the background, instantly giving depth. In all the shots there was a large depth of field because the pictures were all fully in focus and I did not use aperture settings when taking any of them. They all show that the depth goes on and on through the use of their strong focuses.
My depth and space photos were taken both out of class and in class. My first shot is of a street that was lined on the sides with a brick wall and trees. As I was driving down it I saw that it looked like it just continued to go on forever and the depth of it was incredible, and so I got out and took a photo. The second photo is of a bunch of bricks facing towards a center point to give the idea that they keep going back and back and back through the use of leading lines. The third photo is a framed photo to give the idea of depth by showing viewers that the water and the sky are behind the plant that I was taking this photo through. The framing plant serves as a foreground and allows the sky and water to be the background, instantly giving depth. In all the shots there was a large depth of field because the pictures were all fully in focus and I did not use aperture settings when taking any of them. They all show that the depth goes on and on through the use of their strong focuses.
___________________________________________________________________
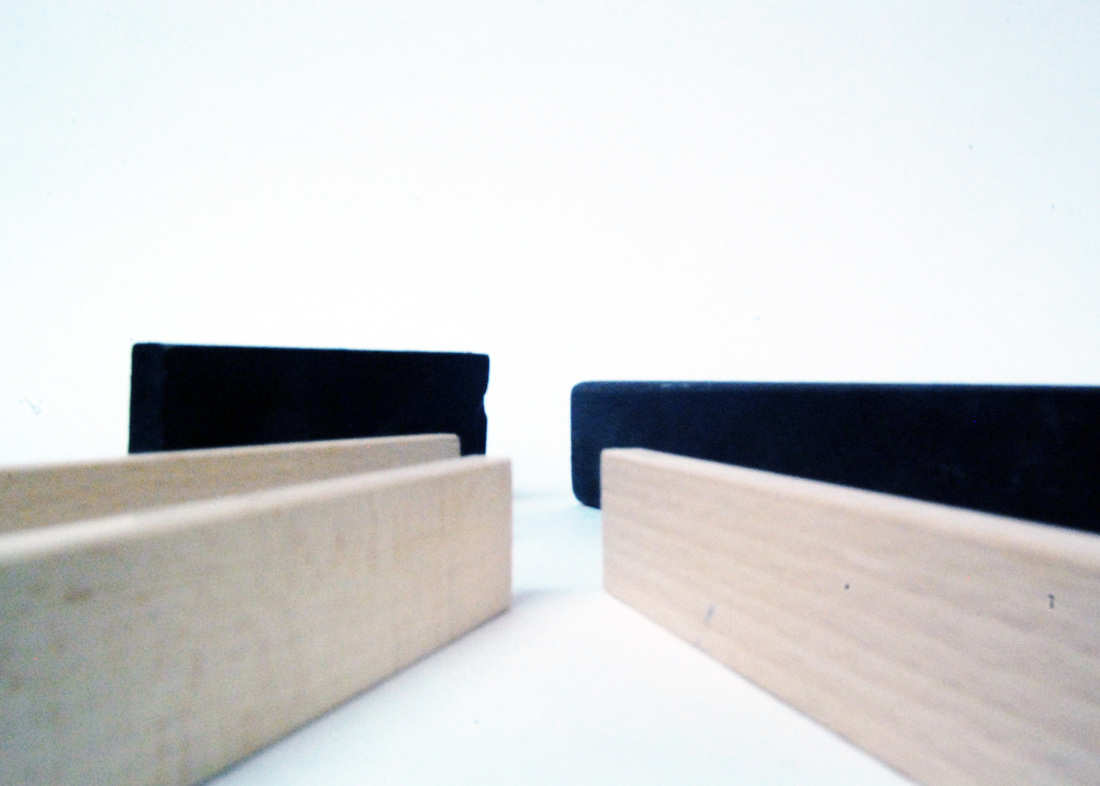
Assignment 6: Object, Shadow, & Reflection
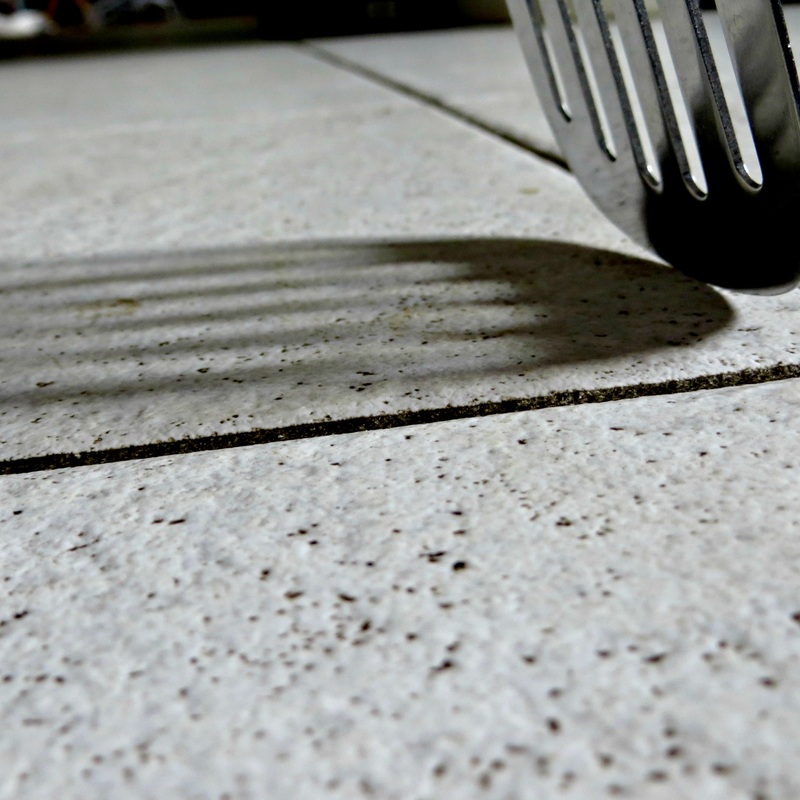
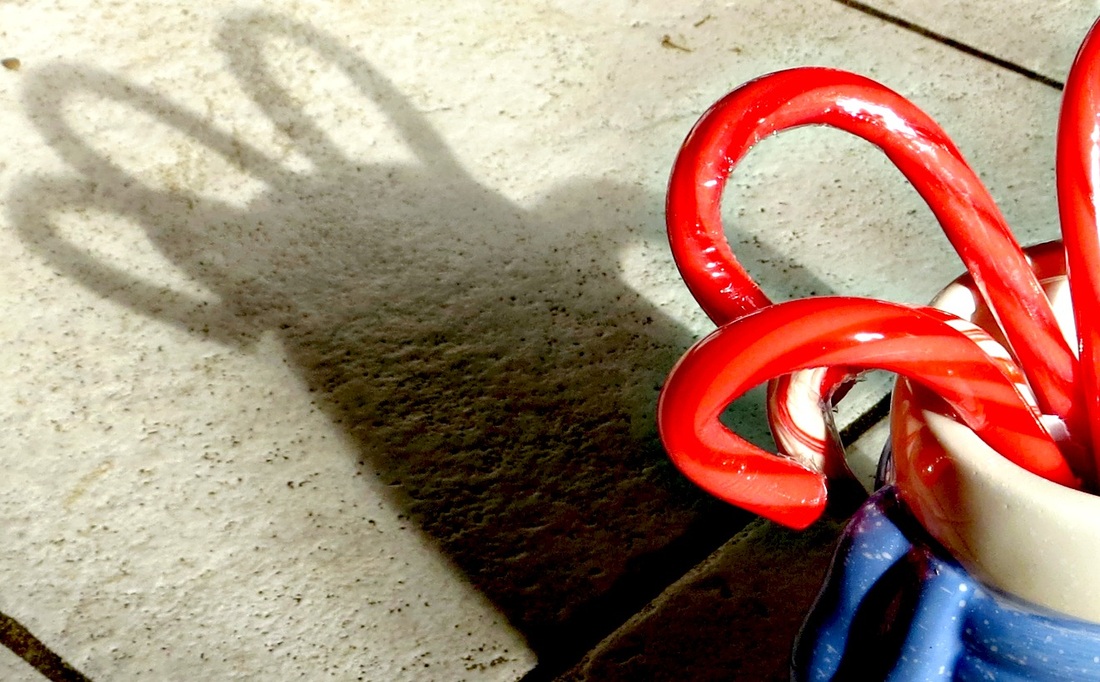
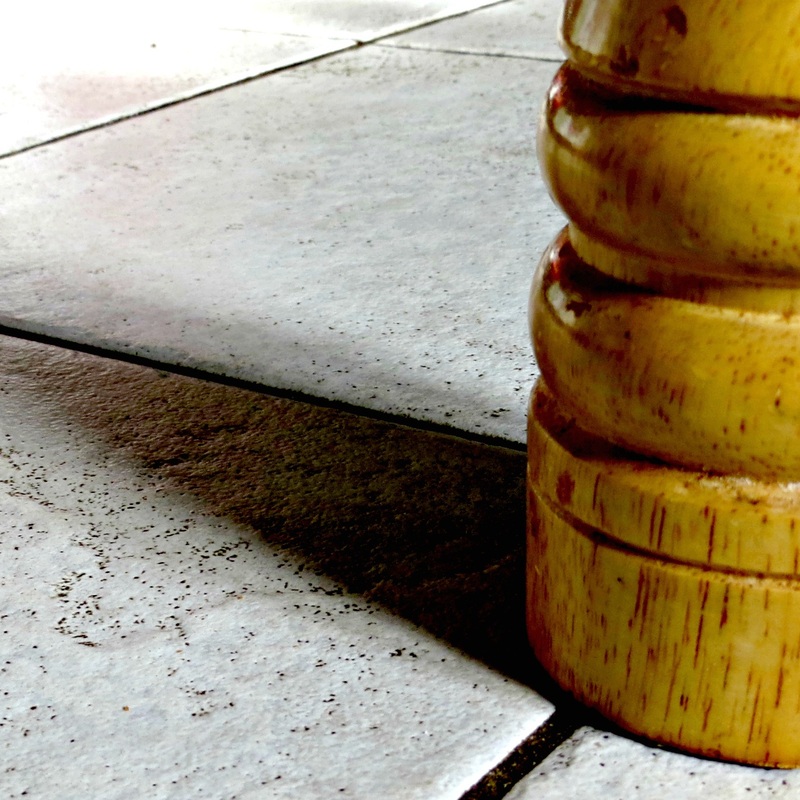
The first 3 photos in this set are my photos for object and shadow. I took all 3 of these photos in my kitchen during the brightest part of the day. There's a window in my kitchen that made it very easy to get shadows out of whatever I wanted to photograph. Also, the kitchen floor is white and I figured that the shadows would come out the most prominent if they contrasted with the floor. I chose to photograph the most interestingly shaped objects I could find in my kitchen so that the shadows would come out very different and intriguing. All 3 of the photos were taken very up close because I didn't want to include full shots of the object that was being used to create the shadows. I also chose to keep all 3 objects slightly in the corners of the photo so that there wasn't just a shadow but also a sneak peak of what the shadow was. In my opinion, it adds interest. In the first photo I took a shot of a metal spatula, which I thought was a very interesting object to use due to the fact that it has oval shaped holes in it. The shadow ended up elongating the spatula and reflected back against it. I took this photo from the ground looking straight at it because I liked how the shadow appeared to stretch out from the object. I also wanted to show how the shadow was being reflected in the spatula. The second photo is of a mug of candy canes, which ended up creating a shadow with one large piece and multiple oval shapes coming out from it's sides. I shot this photo from above so that you could still somewhat see the candy canes but also a lot of the actual shadow. In the third photo, I used a pepper grinder in order to make a shadow. I expected this shadow to come out very curvy and weaving because the pepper grinder had many indents in it, however, the shadow came out as one big blurred shape. I chose to use the photo anyways, though, because to me the shadow is still interesting even though it doesn't make a unique shape. Because I took it at an angle looking downwards, the shadow appears to just go on forever. It reminds me of a long road going off into the horizon. All 3 photos were kept in color because if they were in black and white the shadows would not stand out as much. The most interesting part of all of these photos is the fact that you can't necessarily tell what the objects are and you are left to figure it out based on the shadows. It's very mysterious.
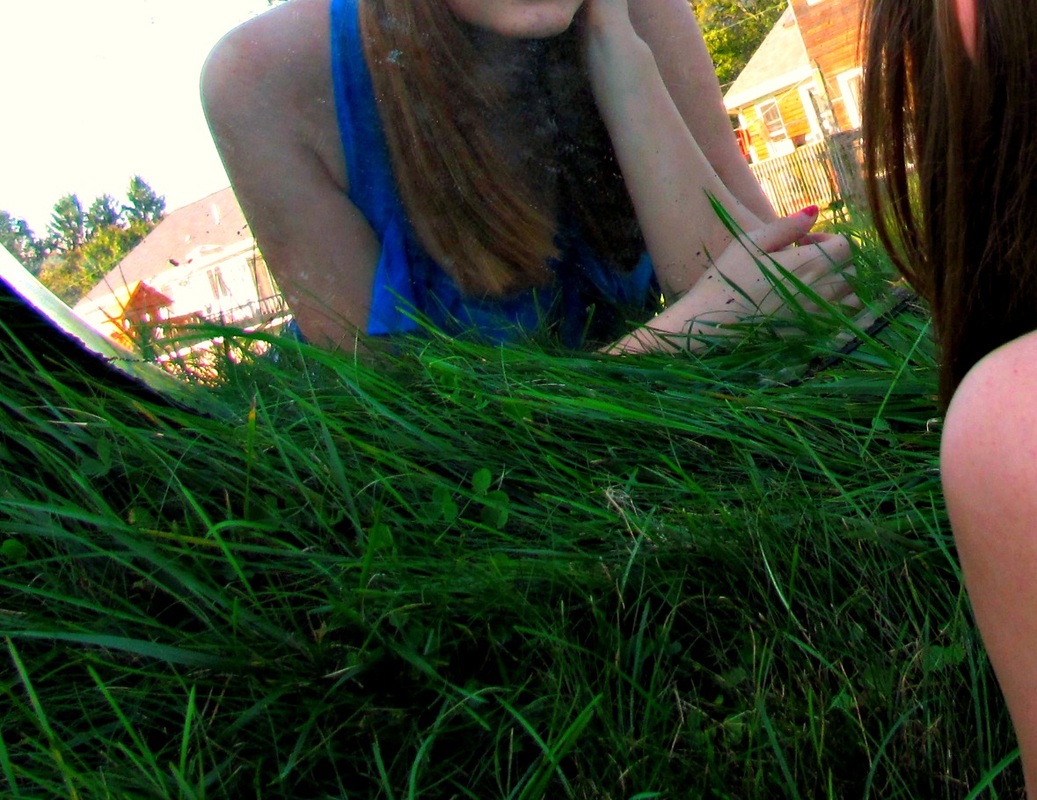
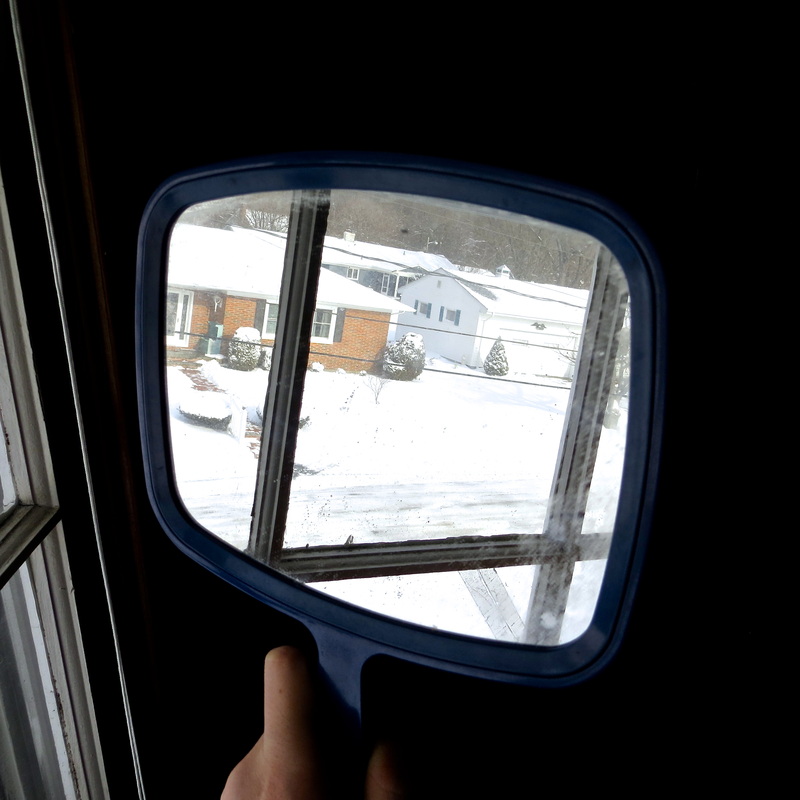
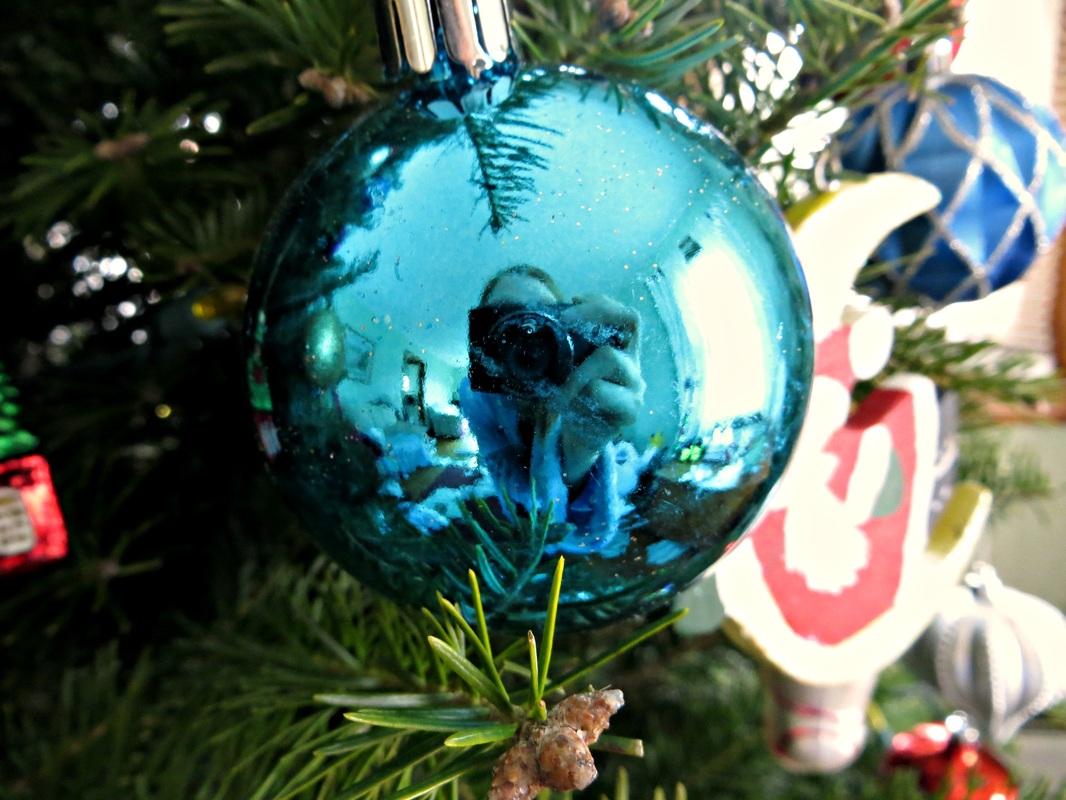
The next 3 photos in the set are the photos I took for reflection. The first photo of the 3 is of me looking into a mirror that was on the ground in my cousin's backyard. I originally had my whole entire self in the photo, but I chose to crop it to add mystery to it. You can see the person on both sides of the mirror, front and back, but you can't tell who it actually is. It adds a lot of intrigue and interest. This photo was taken from behind the subject of the photo in order to capture both sides of this reflection: the real side, and the reflected side. I also chose to use the rule of thirds and center the mirror/reflection in the top third and the actual person in the far right third. This made it more aesthetically pleasing. I chose to keep this photo in color because I think having all the different colors added to the photo and to the reflection. The outline of the mirror and the fact that it is a reflection could easily be missed in black and white. In the 2nd photo in the set you can see the outside reflection from a handheld mirror inside. I took this photo because I thought it would add a lot of contrast to have the quiet, dark indoors against the cold, snowy, bright outdoors. This also added color contrast between the snowy whites and the darkness inside. For that reason, I chose to keep the photo in color. I held the mirror within a few inches of the window so that the details of outside could be seen, like the snowy trees and the plow marks in the road. I think this photo is very interesting because it's showing two different types of weather/environments in one photo. In the final photo of the bottom row, you can see me in the reflection of a bright blue Christmas tree bulb. I struggled a lot taking this photo because I really wanted to make sure that you couldn't see me, but because the bulb was a sphere, whatever angle I tried to take a shot of it from, you could see me. I finally gave up and included myself in the photo. In the bulb you can see the reflections of not only me, but the leaves of the Christmas tree and the window in the background. It gives you an idea of what the surroundings are around the Christmas tree, and makes you wonder whose home it's in and where the tree is. I chose to keep this photo in color because I thought the blue really popped against the green of the tree, and I wanted to emphasize the different color contrasts that were occurring.
The next 3 photos in the set are the photos I took for reflection. The first photo of the 3 is of me looking into a mirror that was on the ground in my cousin's backyard. I originally had my whole entire self in the photo, but I chose to crop it to add mystery to it. You can see the person on both sides of the mirror, front and back, but you can't tell who it actually is. It adds a lot of intrigue and interest. This photo was taken from behind the subject of the photo in order to capture both sides of this reflection: the real side, and the reflected side. I also chose to use the rule of thirds and center the mirror/reflection in the top third and the actual person in the far right third. This made it more aesthetically pleasing. I chose to keep this photo in color because I think having all the different colors added to the photo and to the reflection. The outline of the mirror and the fact that it is a reflection could easily be missed in black and white. In the 2nd photo in the set you can see the outside reflection from a handheld mirror inside. I took this photo because I thought it would add a lot of contrast to have the quiet, dark indoors against the cold, snowy, bright outdoors. This also added color contrast between the snowy whites and the darkness inside. For that reason, I chose to keep the photo in color. I held the mirror within a few inches of the window so that the details of outside could be seen, like the snowy trees and the plow marks in the road. I think this photo is very interesting because it's showing two different types of weather/environments in one photo. In the final photo of the bottom row, you can see me in the reflection of a bright blue Christmas tree bulb. I struggled a lot taking this photo because I really wanted to make sure that you couldn't see me, but because the bulb was a sphere, whatever angle I tried to take a shot of it from, you could see me. I finally gave up and included myself in the photo. In the bulb you can see the reflections of not only me, but the leaves of the Christmas tree and the window in the background. It gives you an idea of what the surroundings are around the Christmas tree, and makes you wonder whose home it's in and where the tree is. I chose to keep this photo in color because I thought the blue really popped against the green of the tree, and I wanted to emphasize the different color contrasts that were occurring.
___________________________________________________________________
Assignment 8 : Cityscape, Landscape, Seascape

|
|
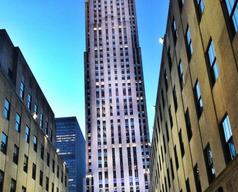
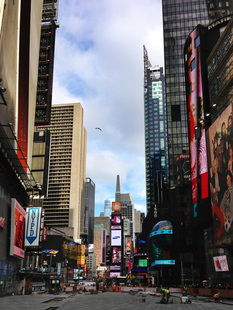
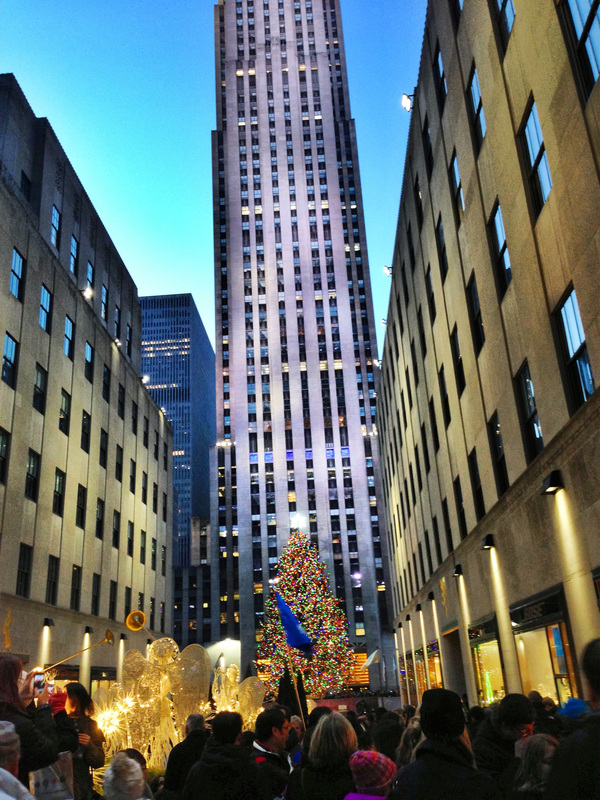
The location I chose to shoot these photos was New York City because I just happened to be there over the past weekend and I knew that there was no better place to get cityscape shots than there! I chose to focus on taking photos of the buildings because they were everywhere and I could get endless, interesting photos. Almost every photo is the same, all taken from semi far away distances looking at all of the buildings together with all their different heights and colors. In the 5th picture in the first row, I chose to take an up close shot of a building that was actually built curved. In person when I looked up it was absolutely crazy looking and so I took my camera and shot from below looking straight up.
|
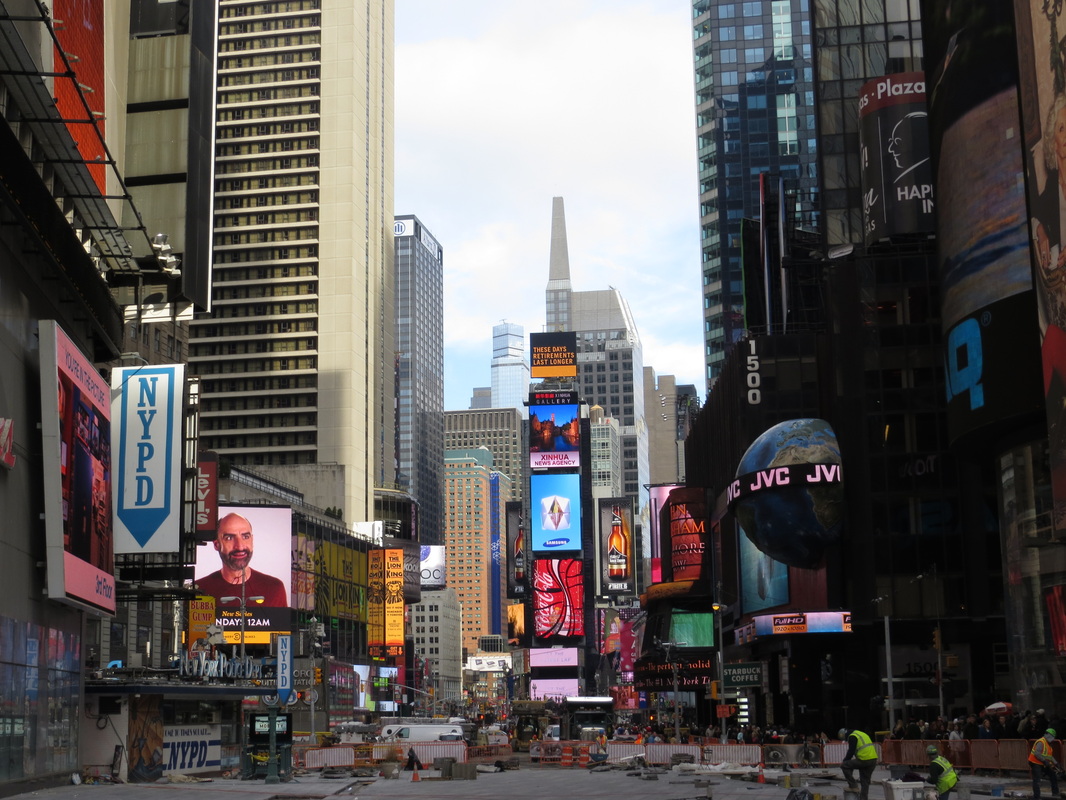
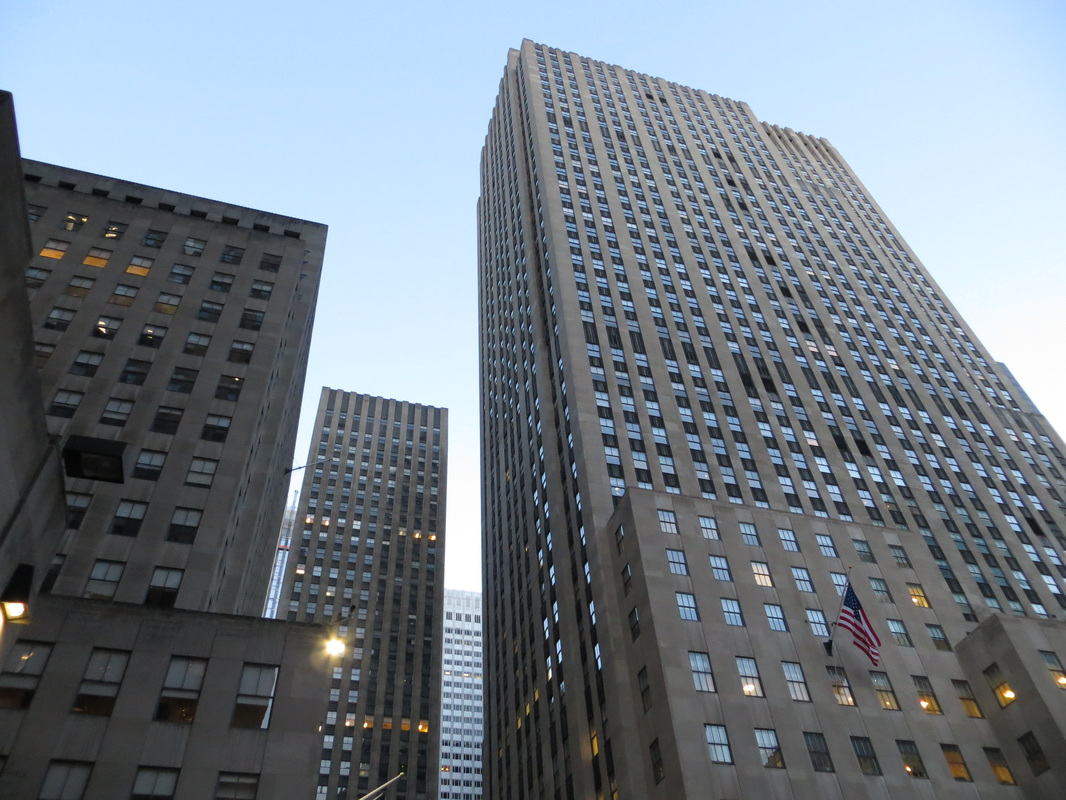
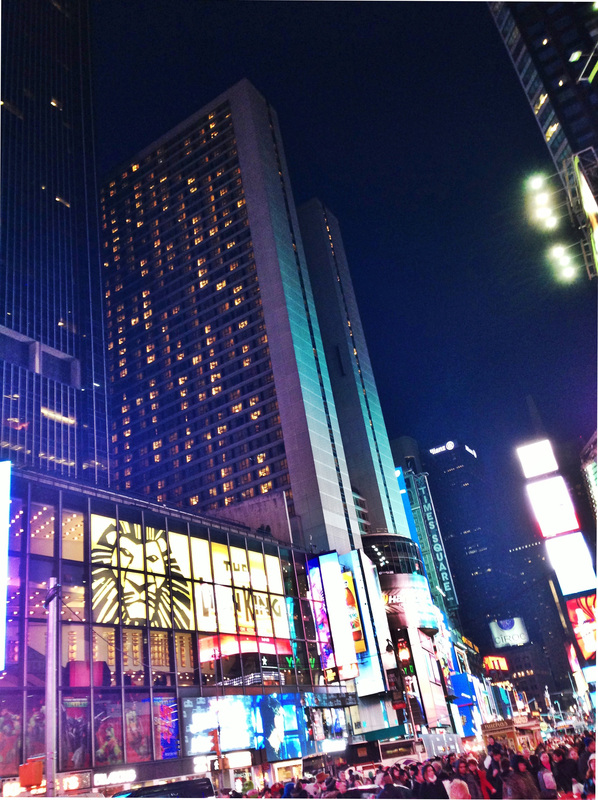
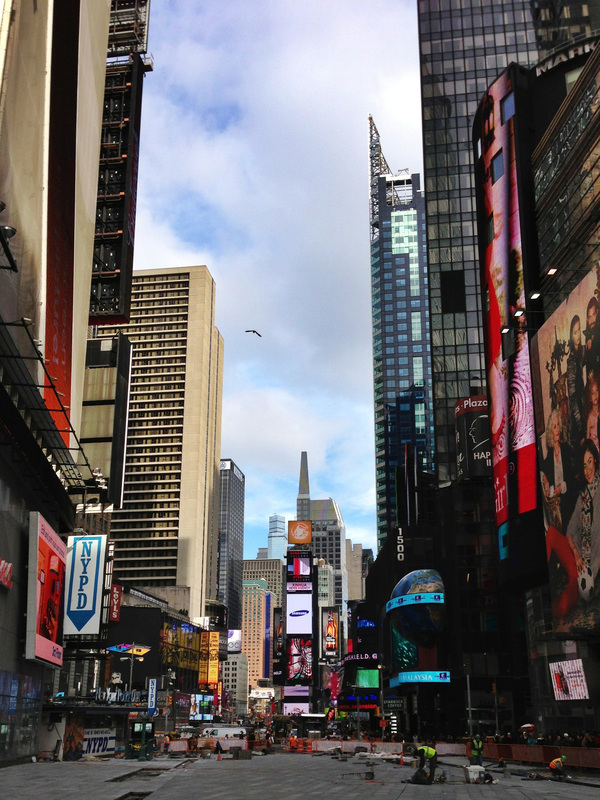
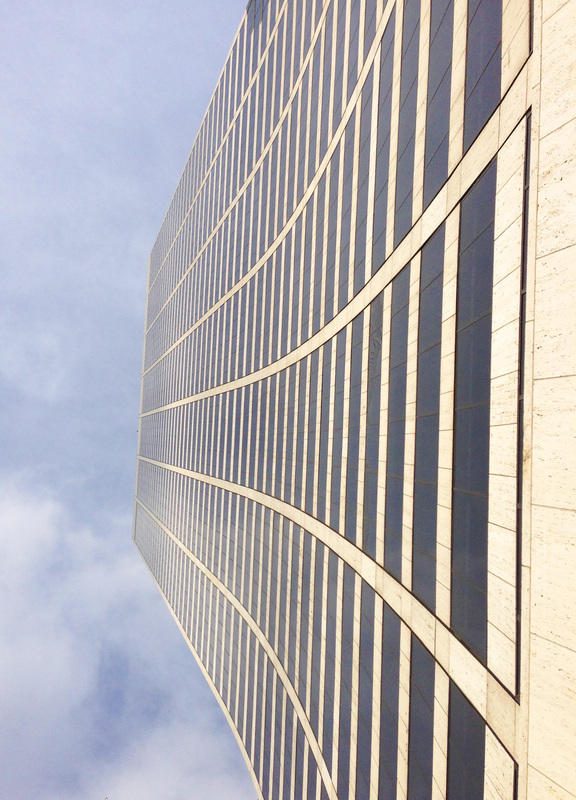
I chose to take vertical photographs because it highlight how tall the buildings were. If I had chosen horizontal it would have just cut them off and the effect would not have been the same. I incorporated a lot of pattern, shape, and line to add visual interest to the photos. I used shape to show the differences between the buildings heights. They almost look like a bunch of rectangles, all of scattered sizing, being put together like on a bar graph or something. I thought that was pretty interesting. I also used the natural outlines of the building to help guide the eye up. The lines keep going straight up so naturally the eye does too. I also used the pattern of the windows to add visual interest. I noticed the second I got to the city that the windows were so uniform and there were hundreds of them, all the same size and shape, covering these enormous skyscrapers. It was mesmerizing to look at and I wanted to capture that in my photographs. I didn't use a ton of depth of field because I was more focusing on the shapes and height of the buildings rather than the overall scenes, but in a photo I took of times square I did try to use the buildings as siding to frame the photo and used their cascading heights to show how vast Times Square was. I think the photograph communicates that its a very large place, very crowded, very dense, and just an overall city environment. I think it also shows a very industrial side of scenery, which is very contrasting with the other set of scenery photos I took down below for seascape and landscape.
___________________________________________________________________
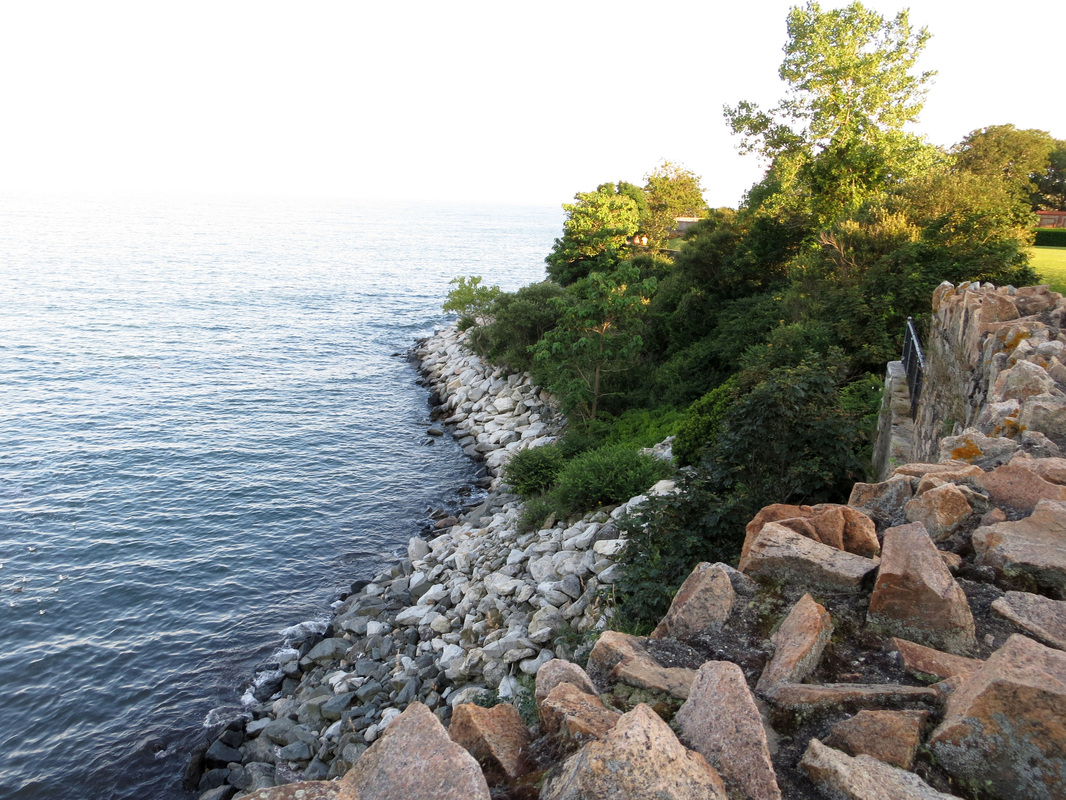
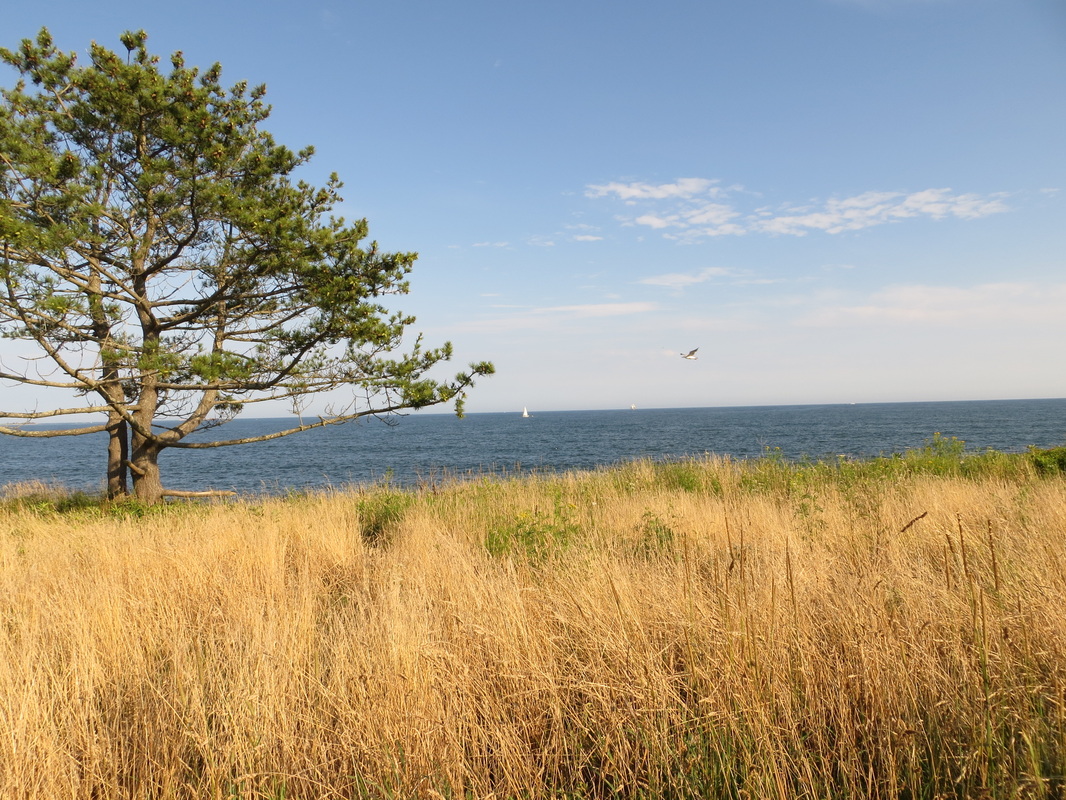
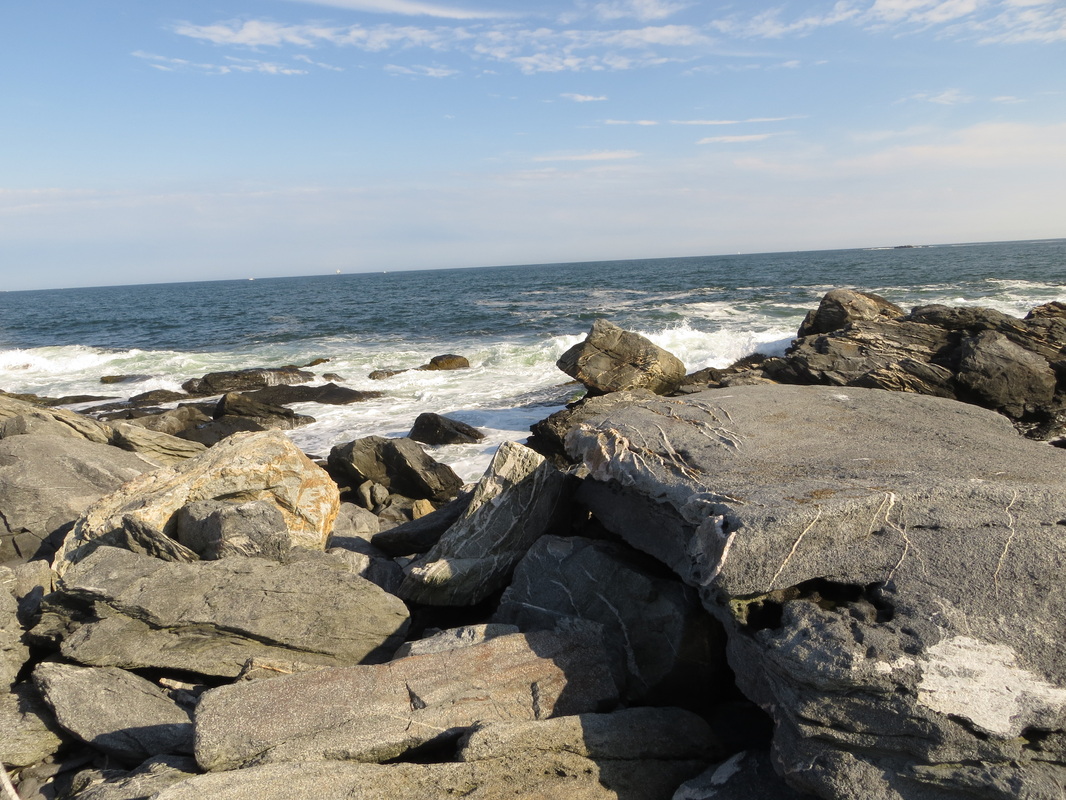
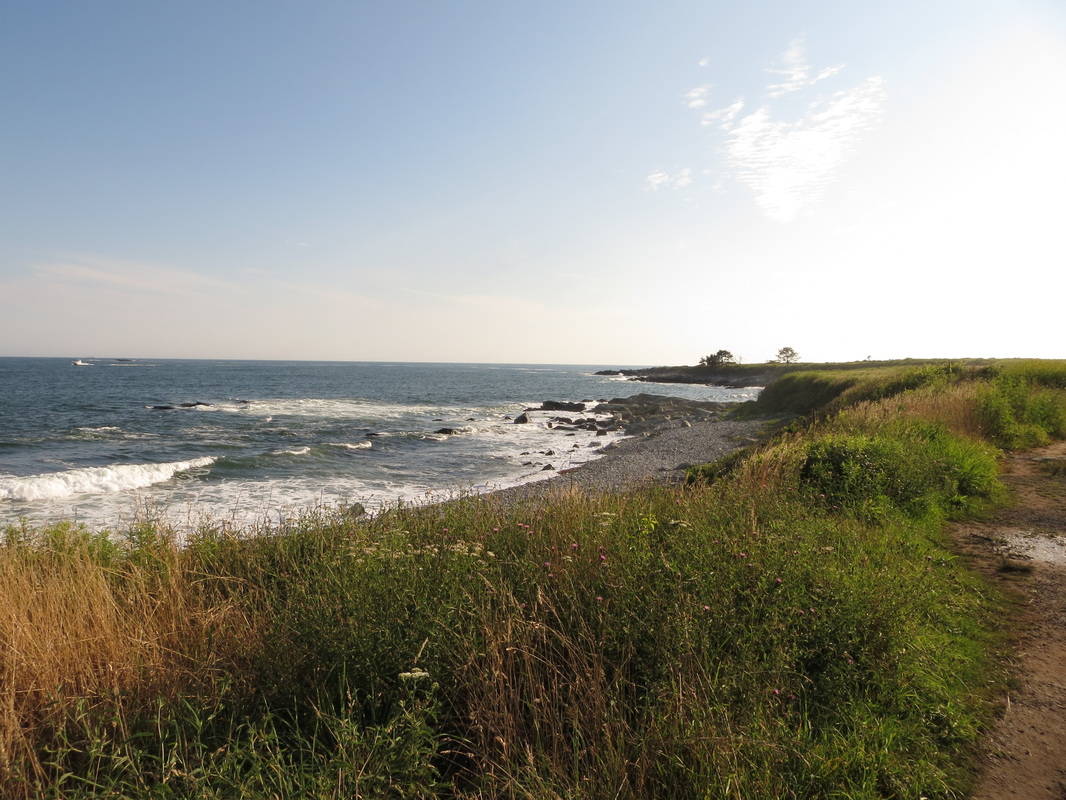
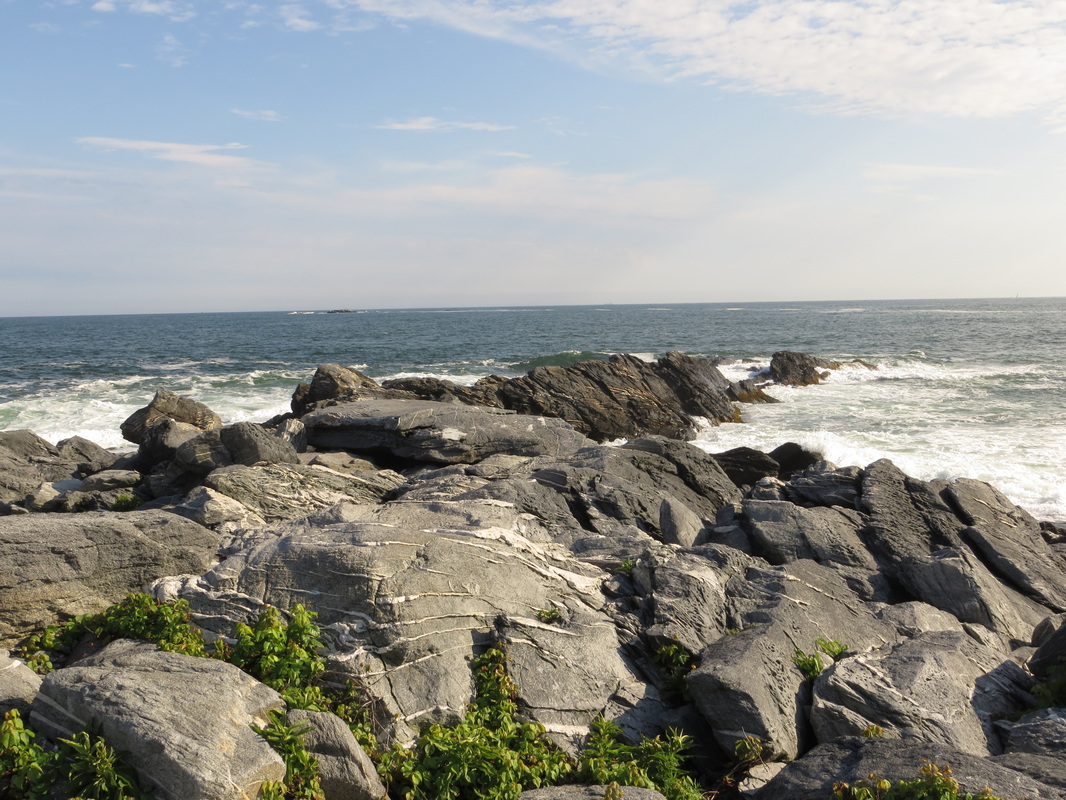
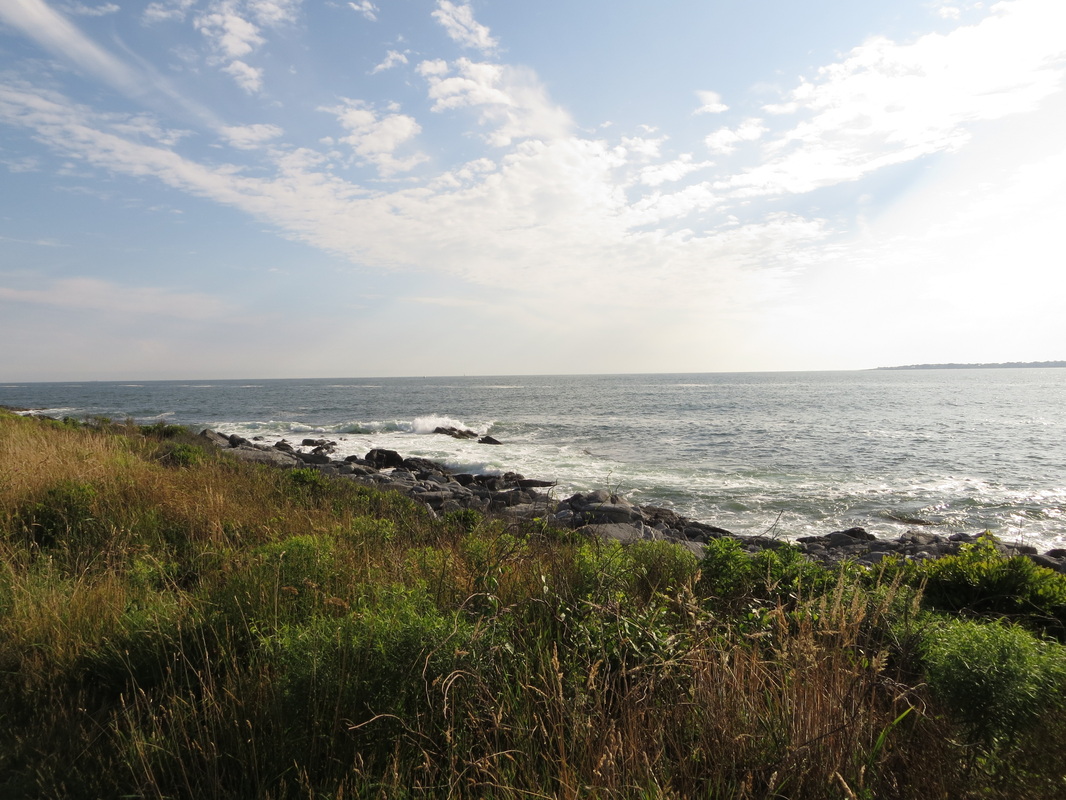
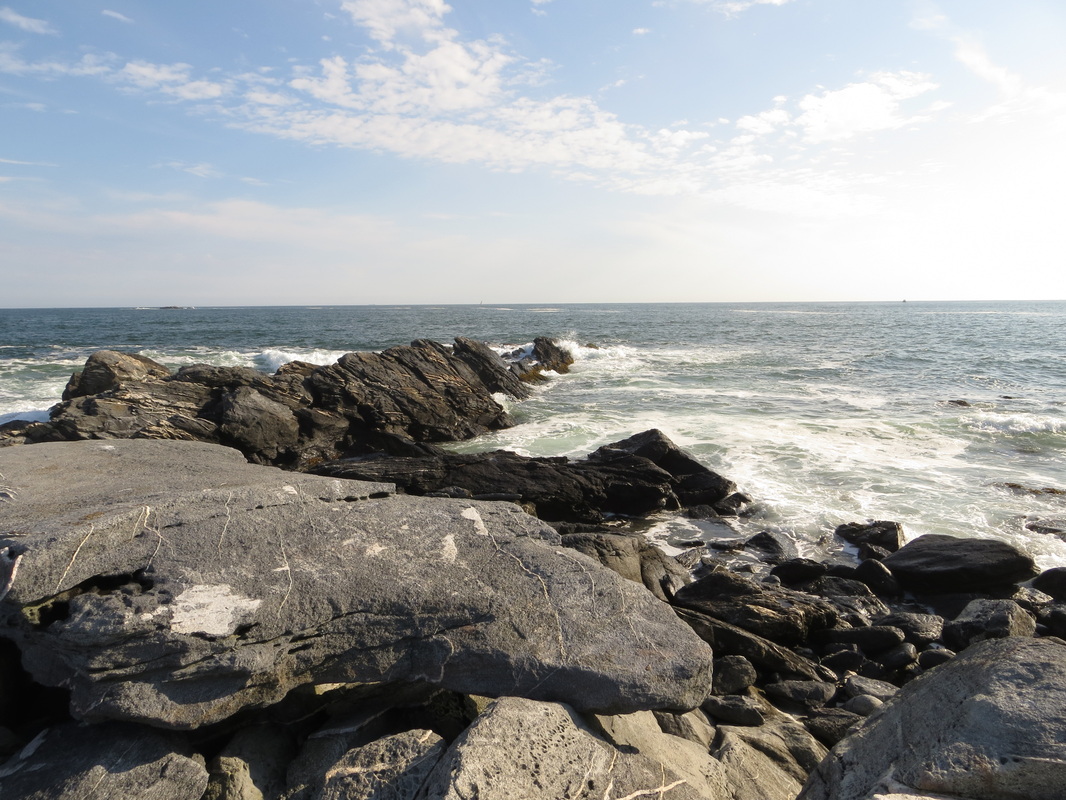
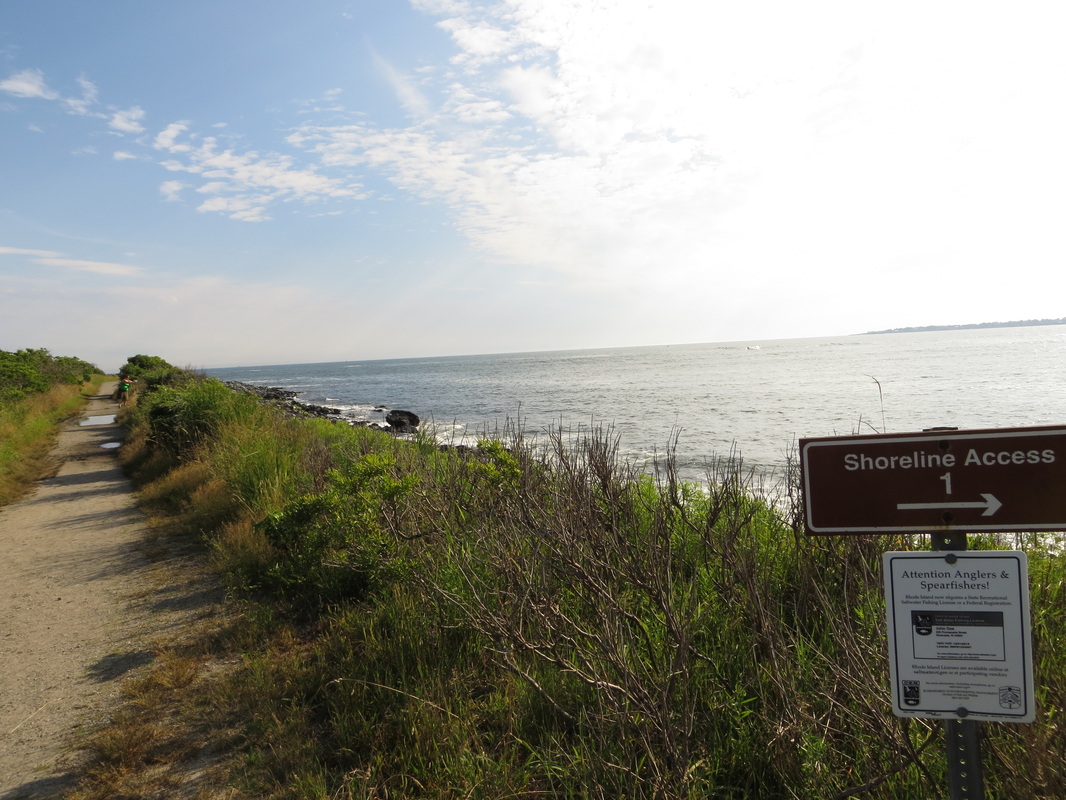
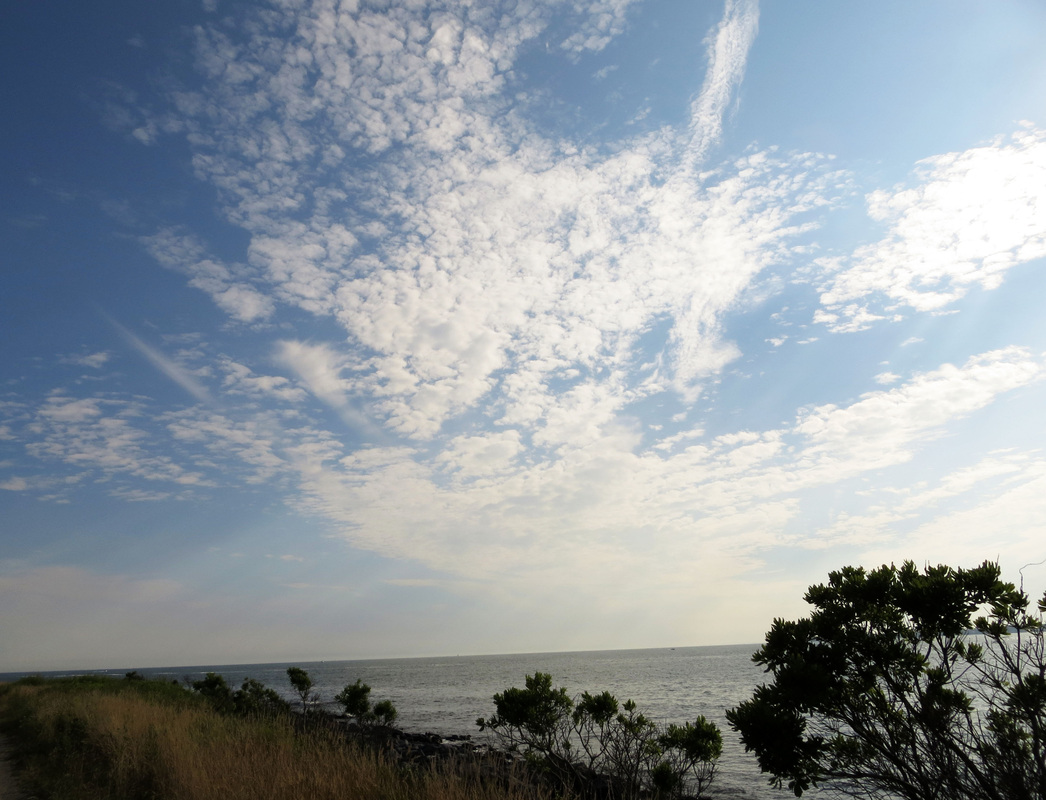
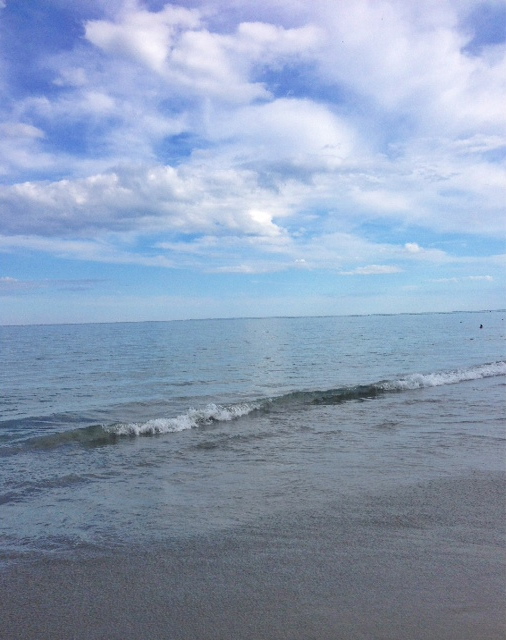
The above shots were taken in Newport, Rhode Island. I chose to shoot at this location because I was already there and I saw the landscape and I knew I just had to. I knew I was taking a digital photography class and I figured that seascape/landscape would come up as an assignment, so I made sure to take plenty of shots that I could use for the class. The photos I took were all taken during midday in the middle of the Summer. I took photos of the water, the trees, the grass, the rocks: basically the entire landscape in general. The distance in the shots varies from being up close to farther away. I based my distance on 2 things: how much of the landscape I actually wanted in the shot, and most importantly how close I could get to what I was shooting. For example, I really wanted to get full shots of the grass and the water combined. I also was not trying to climb down those rocks (which were extremely slippery) to get a more zoomed in shot. I tried to create a foreground, middle ground, and a background by placing different types of the land in different sections of the shot. I wanted there to be an equal ration of grass/rock:water:sky, making the sky the background, the water the middle ground, and the rocks or grass the foreground. When I took the photos I took them from a straight on point of view because that was 1) really the only safe angle I could get, and 2) I wanted people looking at the photos to feel like they were actually standing there in front of that scene, looking right at it as if they were there. The only photo I had to take from above was the 1st photo in the top row, but that was only because it was the only angle I was able to access the shot. All of the photos are horizontal, and I chose to do that because I feel like landscape just needs to be horizontal in order to include as much as possible. If it were vertical there would have been way too much sky and not enough view of the overall scenery. I did try to incorporate line and texture to add interest to the shots. I used the rocks in the photo as texture pieces, and also made sure to capture the waves as they hit in order to get that ruffly texture that can be seen in a few of the shots above. I captured the texture of the water in order to portray in the photo that the water was moving and active. I also tried to use line to guide the eye and show a sort of visual pathway that I was physically taking in my walk down the path. I wanted the eye to travel just as I did and follow throughout the photo. I wish I had known about shutter speed when I took these shots, because I feel like I could have gotten some very visually interesting shots of the water, and I plan to go back when the weather gets nicer out and test it out. However, although I didn't use shutter speed, I did use depth of field to help build up the scenery and make it seem like it kept going on and on and on (which the water line, the sky, and some of the paths really did- at points it honestly seemed like the view would never end *3rd photo on the bottom row*). I think these photographs just show off the amazing beauty that this place had. Its not everyday that you see things like this, and the shots don't even compare to what it was like in person, but they do a pretty good job. It shows people who have never been that its a very vast place focused on nature and surrounded by water and endless sky. The photos quickly and shortly show 9 visual shots that sum up the 2 hour walk around this small little island.
